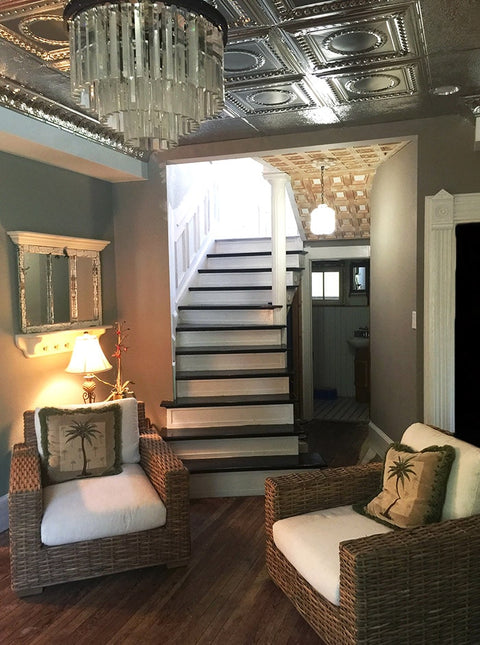
Renovating a Victorian Home - Nevin and Sharla's Tin Ceiling Installation

HOME STYLE: Victorian
Renovating a Victorian home is a project conducted with the utmost care. A sense of historicity is essential in preserving the space, but so too are upgraded touches and design elements. When Nevin and Sharla undertook the renovation of their 100+ year old Victorian home in Defuniak Springs, Florida, they incorporated the peerless beauty of a tin ceiling to capture a sense of the traditional, giving their space a bright, "wow" factor along the way. Read more on why Nevin and Sharla selected American Tin Ceilings and how they installed the Nail-Up ceiling tiles themselves.
What inspired this project?
"A combination of our taste in traditional architecture and interior design and also combing through Pinterest looking at various pictures of rooms with tin ceiling designs."
Have you ever worked with tin before?
"Never. Installed the tin roof on our porch and portico but never tin ceiling products."
Why did you select the pattern and colors you chose?
"We looked through the various panel patterns on the American Tin Ceilings website and finally settled on Pattern #7. We were in Tampa and I decided to make the trip over to the American Tin Ceiling warehouse to take a look at your products firsthand and see what would best fit our space.
The employees at American Tin Ceiling were extremely helpful and friendly and actually took the time to lay out several different patterns on the warehouse floor to give me a feel for how it would look in our dining room. I almost decided to go with a wallpaper style pattern (Pattern #2) since our dining room ceiling isn't a large area but in the end my wife, Sharla, pushed for Pattern #7 (our original choice) which ended up being perfect for the room."
What were your aesthetic and functional goals in using tin?
"We've always loved the way old Victorian tin ceilings look and since we're renovating a 100 plus year old Victorian house in the historic district of Defuniak Springs, Florida we thought that it was the perfect fit. I like the old salvaged tin ceiling panels from Victorian homes but when you look at price it's actually way cheaper to purchase new panels plus it's hard to find larger matching quantities of the old stuff."
Tell us about the installation.


"The installation of the ceiling panels was pretty easy. After leveling the ceiling with 2x4s we installed ½” sheets of plywood so we could use the Nail-Up installation method. We marked the ceiling off with chalk lines to make sure the pattern would be symmetric. We used stainless steel 18 gauge nails and went panel by panel until we were done. The harder part was the crown installation. Installing the crown for the pieces that didn't need cutting was easy as all you had to do was follow the chalk line and nail the top (ceiling side) of the tin crown to the ceiling. Inside corners were more of a challenge since no corner in our house is perfect so I typically had to manually modify the profile of each piece to make the perfect fit. If your walls level and corners close to 90 degrees the crown installation will go much smoother but with a 100 plus year old house that's rarely the case."
Were we needed or able to provide any assistance or installation advice?
" I took a look at the online material for installation and one of the employees made suggestions on the panel layout using the planner which was helpful."
Inspired Yet?! From ceilings to backsplashes, tin tiles improve a room - get your samples with FREE shipping!


